Lifestyle
Create Your Own Native Wood Display Vase in Six Simple Steps

Craft enthusiasts can now embark on a rewarding DIY project by creating a native wood display vase using accessible materials and tools. This project not only allows for creativity but also promotes the use of scrap timber, making it an environmentally friendly choice.
Materials and Tools Needed
To begin, gather the following materials: a length of approximately 275mm rimu or similar wood, ideally with dimensions of 70mm x 45mm. This project is perfect for utilizing leftover timber. Additionally, you will need masking tape, sandpaper, and ten glass test tubes measuring 12mm x 75mm, which are widely available at craft supply stores or online. For those wishing to add a personal touch, consider using Resene finishes. For instance, the author used Resene Woodsman Stain in Bark and Double Alabaster for a snowflake design.
The required tools include a tape measure or ruler, a pencil, a hand saw, a power drill, a 3mm wood drill bit, along with paintbrushes and rags for cleaning.
The total cost for this project is approximately $20, excluding any Resene products.
Step-by-Step Instructions
Step 1: Measure and Cut
Start by measuring the wood to ensure it fits the desired dimensions. Use a hand saw to cut the rimu to the specified 275mm length.
Step 2: Measure and Mark
Once cut, measure and mark the positions where the test tubes will be inserted. Ensure these markings are evenly spaced for a balanced appearance.
Step 3: Drill
Utilize the power drill with the 3mm wood drill bit to create holes at the marked locations. Make sure the holes are deep enough to securely hold the test tubes.
Step 4: Sand
After drilling, sand the edges and surfaces of the wood to remove any rough spots. This step is crucial for achieving a smooth finish.
Step 5: Dust and Stain
Once sanding is complete, dust off any debris. If desired, apply the stain for color and protection, following the manufacturer’s instructions for the best results.
Step 6: Decorate
Lastly, add any decorative elements or finishes to personalize your display vase. This is where creativity can truly shine.
With these steps, crafting a native wood display vase becomes an enjoyable and straightforward task. Not only does it serve as a beautiful decorative piece, but it also reflects a commitment to sustainability by repurposing wood.

Create Your Own Native Wood Display Vase in Six Simple Steps

Labour MP Critiques Taxpayers Union During Heated Debate

Mitchell Santner Excluded from Tests, Joins Golf Event with Fox

Drowning Incidents at Auckland Beaches Prompt Urgent Safety Appeals

Labour MP’s Fiery Exchange on Taxpayers Union Sparks Debate

New Zealand Muslims Reflect on Jesus and Christmas Significance

Syrians Celebrate First Freedom Day After Decades of Oppression

Sassy Lass Aims for Victory in Waikato Cup After Near Miss

Wellington Mayor Andrew Little’s Funding Sources Uncovered

Test Your Knowledge: Take the Herald’s Afternoon Quiz Today

PM Faces Backlash from Fans During Netball Trophy Ceremony

Dunedin Designers Win Top Award at Hokonui Fashion Event

Tongan Star Eli Katoa Shares Recovery Update After Surgery

Experience the Excitement of ‘Chief of War’ in Oʻahu

Liam Lawson Launches New Era for Racing Bulls with Strong Start

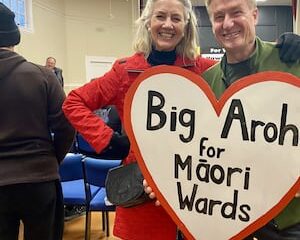
Coalition Forms to Preserve Māori Wards in Hawke’s Bay

Walking Faster Offers Major Health Benefits for Older Adults

Disney Fan Reveals Dress Code Tips for Park Visitors
-
 World5 months ago
Test Your Knowledge: Take the Herald’s Afternoon Quiz Today
-
 Sports5 months ago
PM Faces Backlash from Fans During Netball Trophy Ceremony
-
 Lifestyle5 months ago
Dunedin Designers Win Top Award at Hokonui Fashion Event
-
 Top Stories2 weeks ago
Tongan Star Eli Katoa Shares Recovery Update After Surgery
-
 Entertainment5 months ago
Experience the Excitement of ‘Chief of War’ in Oʻahu
-
 Sports5 months ago
Liam Lawson Launches New Era for Racing Bulls with Strong Start
-
 World5 months ago
Coalition Forms to Preserve Māori Wards in Hawke’s Bay
-
 Health5 months ago
Walking Faster Offers Major Health Benefits for Older Adults
-
 Lifestyle5 months ago
Disney Fan Reveals Dress Code Tips for Park Visitors
-

 Politics5 months ago
Scots Rally with Humor and Music to Protest Trump’s Visit
-

 Top Stories5 months ago
UK and India Finalize Trade Deal to Boost Economic Ties
-

 Health3 months ago
Radio Host Jay-Jay Feeney’s Partner Secures Visa to Stay in NZ